A leaking bathroom tap is a common household issue that many people face at some point. Not only can it be annoying with the constant dripping sound, but it can also lead to higher water bills and potential water damage if not addressed promptly. Understanding the causes of a leaking bathroom tap and knowing how to fix it can save you time, money, and frustration.
In this article, we will delve into the various reasons a tap might leak, provide step-by-step guidance on how to repair it, and offer tips on how to prevent future leaks. With the right knowledge and tools, you can tackle this issue effectively and maintain a well-functioning bathroom.

Understanding the Causes of a Leaking Bathroom Tap
Worn-Out Washers
One of the primary reasons for a leaking bathroom tap is a worn-out washer. Washers are small rubber rings that create a seal inside the tap. Over time, these can wear down, leading to leaks. It’s important to replace them regularly to ensure a snug fit.
Corroded Valve Seat
The valve seat connects the tap to the spout and can corrode over time due to mineral deposits in the water. This corrosion can cause leaks around the spout area. Regular cleaning and maintenance of the valve seat can prevent this issue.
Loose Parts
Loose parts within the tap can also cause leaks. Over time, the constant usage of the tap can loosen screws and other components, leading to water escaping from unintended areas.
High Water Pressure
Excessively high water pressure can lead to leaks as it puts extra strain on the tap’s components. Ensuring that your water pressure is within the recommended range can help prevent leaks.
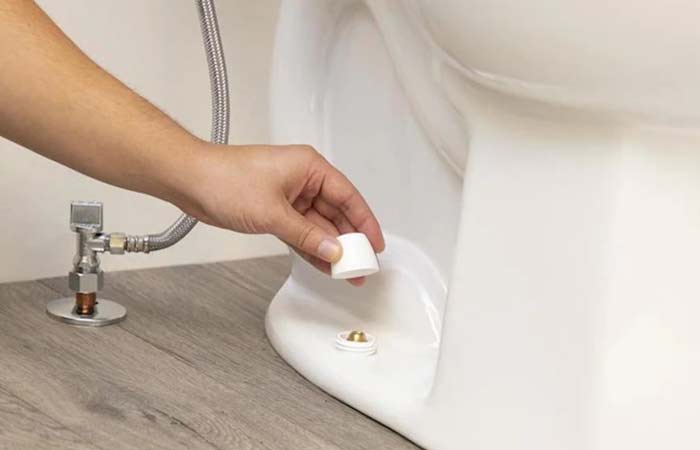
How to Fix a Leaking Bathroom Tap
Gathering the Necessary Tools
Before you begin, gather the necessary tools to fix your leaking bathroom tap. You will need a wrench, screwdriver, replacement washers, and plumber’s tape.
Turning Off the Water Supply
Start by turning off the water supply to your bathroom. This is a crucial step to prevent any water from escaping while you’re working on the tap. Once the water is off, turn on the tap to drain any remaining water.
Disassembling the Tap
Use a screwdriver to remove the handle of the tap. Once the handle is removed, you can access the internal components. Take note of how the parts are arranged to ensure easy reassembly.
Replacing the Washer
Locate the washer inside the tap and remove it using a wrench. Replace it with a new washer of the same size and ensure it’s fitted snugly. This should stop the leak if the washer was the issue.
Reassembling the Tap
Once the washer is replaced, reassemble the tap by reversing the disassembly steps. Ensure all components are tightened securely to prevent any loose parts from causing future leaks.
Turning the Water Supply Back On
After reassembling the tap, turn the water supply back on and check for any leaks. If the tap is still leaking, additional troubleshooting may be required to identify the issue.
Preventing Future Bathroom Tap Leaks
Regular Maintenance
Conduct regular maintenance checks to ensure all components of your bathroom tap are in good condition. Replace washers and other parts as needed to prevent wear and tear.
Monitoring Water Pressure
Keep an eye on your water pressure to ensure it’s within the recommended range. High water pressure can cause damage to taps and other plumbing fixtures.
Using Quality Materials
When replacing parts or installing new taps, use quality materials that are less likely to wear out quickly. Investing in durable components can save you from frequent repairs.
Conclusion
Dealing with a leaking bathroom tap can be a hassle, but with the right knowledge and tools, it’s a manageable task. By understanding the causes of leaks, learning how to fix them, and implementing preventative measures, you can maintain a well-functioning bathroom and avoid costly repairs.

FAQs
How do I know if I have a leaking bathroom tap?
Signs of a leaking bathroom tap include constant dripping, water pooling around the base of the tap, and an increase in your water bill. Regularly check your taps for these signs to catch any leaks early.
Can I fix a leaking bathroom tap myself?
Yes, fixing a leaking bathroom tap is a task that can be done yourself with the right tools and knowledge. However, if you’re unsure or uncomfortable with DIY repairs, it’s always best to seek professional assistance.
How often should I check my bathroom taps for leaks?
It’s a good idea to check your bathroom taps for leaks at least once every few months. Regular checks can help you catch potential issues early and prevent them from becoming larger problems.
For more information on checking and fixing bathroom leaks, visit Watters Plumbing’s guide on leak signs or check out Baker Smith’s tips on bathroom leaks.
For additional guidance on fixing leaks, you can visit Valvex’s bathroom leak fix guide, or explore more solutions on Valvex’s bathroom sink leak fix page.
This article contains affiliate links. We may earn a commission at no extra cost to you.


