Replacing a shower drain gasket might seem like a daunting task, but with the right guidance, it can be a straightforward DIY project. Understanding how to replace shower drain gasket is crucial for maintaining your shower’s functionality and preventing leaks. In this article, we will explore the steps involved in this process, ensuring that even those new to home improvement can feel confident in their skills.

Understanding the Importance of the Shower Drain Gasket
The shower drain gasket plays a critical role in ensuring that water flows smoothly from your shower and does not leak into other areas. This small yet significant component helps maintain the integrity of your bathroom by preventing water damage.
What is a Shower Drain Gasket?
A shower drain gasket is a rubber or silicone seal that sits between the shower drain and the pipe. It creates a water-tight seal, preventing leaks and ensuring proper drainage.
Signs Your Shower Drain Gasket Needs Replacement
Common signs that your shower drain gasket needs replacing include water pooling around the drain, leaking from the shower base, or a persistent musty odor. If you notice any of these issues, it might be time to replace the gasket.
Tools and Materials Needed
Before starting the replacement process, gather the necessary tools and materials. You will need a screwdriver, a wrench, a replacement gasket, plumber’s putty, and a bucket.
Step-by-Step Guide to Replacing the Shower Drain Gasket
Step 1: Remove the Drain Cover
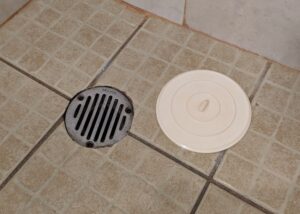
Start by removing the drain cover using a screwdriver. This will expose the old gasket and the drain pipe.
Step 2: Extract the Old Gasket
Using a wrench, carefully loosen and remove the drain flange. This will allow you to access and remove the old gasket.
Step 3: Clean the Area
Clean the area thoroughly to remove any debris or old putty. Ensure the surface is dry before proceeding.
Step 4: Install the New Gasket
Place the new gasket over the drain pipe, ensuring it fits snugly. Apply plumber’s putty around the flange and tighten it securely.
Step 5: Test the Seal
Once the new gasket is in place, run water to test the seal. Check for any leaks and adjust if necessary.
Maintenance Tips for Your Shower Drain
Regular maintenance can extend the life of your shower drain gasket. Ensure that you clean the drain regularly to prevent clogs, and inspect the gasket for wear and tear.
Preventing Clogs and Odors
To prevent clogs, consider using a drain cover that catches hair and debris. Regularly clean the cover to ensure optimal water flow. For more tips on maintaining a clean shower drain, visit this guide.
Regular Inspection
Inspect your shower drain gasket regularly for signs of wear, such as cracks or hardening. Early detection can prevent more significant issues down the line.
When to Call a Professional
If you’re uncomfortable performing this task or encounter complications, it may be best to consult a professional plumber. Knowing when to call for help can save you time and prevent further damage.

FAQs
Why is my shower drain leaking?
Your shower drain may be leaking due to a worn-out gasket or improper installation. Replacing the gasket should resolve the issue.
How often should I replace the shower drain gasket?
Shower drain gaskets typically last several years but should be replaced at the first sign of wear or leaking.
Can I replace the shower drain gasket myself?
Yes, with the right tools and instructions, replacing a shower drain gasket is a manageable DIY project.
By following these steps and maintaining your shower drain, you can ensure a leak-free and efficient shower experience. For more information on shower maintenance, check out this resource.
This article contains affiliate links. We may earn a commission at no extra cost to you.


