Keeping your shower drain trap clean is essential for maintaining a hygienic and efficient bathroom. Knowing how to clean shower drain trap can not only prevent unpleasant odors and clogs but also extend the life of your plumbing system. In this guide, we will explore the steps to effectively clean a shower drain trap, ensuring your bathroom remains a pleasant space.

Understanding the Shower Drain Trap
The shower drain trap is a U-shaped pipe located beneath your shower drain. It is designed to retain a small amount of water, creating a seal that prevents sewer gases from entering your bathroom. Over time, hair, soap scum, and other debris can accumulate in the trap, leading to clogs and unpleasant smells.
Signs Your Shower Drain Trap Needs Cleaning
Before diving into the cleaning process, its important to recognize the signs that your shower drain trap may need attention. Some common indicators include slow drainage, foul odors, and unusual noises coming from the drain. If you notice any of these signs, its time to clean your shower drain trap.
Tools and Materials Needed
To effectively clean your shower drain trap, you will need a few tools and materials. These include a bucket, a wrench or pliers, a drain snake or wire hanger, rubber gloves, and a cleaning solution such as vinegar and baking soda. Having these items on hand will make the cleaning process smoother and more efficient.
Step-by-Step Guide on How to Clean Shower Drain Trap
Step 1: Remove the Drain Cover
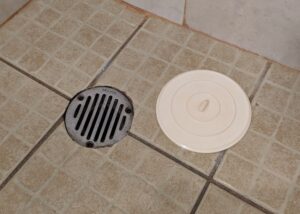
Begin by removing the drain cover. Depending on your shower, this may require unscrewing the cover or simply lifting it off. Once removed, set the cover aside in a safe place.
Step 2: Clear Visible Debris
With the drain cover removed, take a moment to clear away any visible debris such as hair or soap scum. Use a wire hanger or drain snake to reach deeper into the drain and remove any clogs.
Step 3: Disassemble the Drain Trap
Next, locate the drain trap beneath the shower. Use a wrench or pliers to carefully loosen and remove the trap. Be sure to place a bucket underneath to catch any water or debris that may fall out.
Step 4: Clean the Trap
Once removed, thoroughly clean the trap using a cleaning solution such as vinegar and baking soda. Scrub away any buildup or residue, ensuring the trap is completely clean before reassembling.
Step 5: Reassemble the Drain Trap
After cleaning, carefully reassemble the drain trap and secure it in place. Make sure all connections are tight to prevent leaks.
Step 6: Test the Drain
Finally, test the drain by running water to ensure it flows smoothly. If there are no issues, replace the drain cover and enjoy a clean and efficient shower drain.
Preventive Maintenance Tips
Regular maintenance can help prevent clogs and keep your shower drain trap in optimal condition. Consider using a drain cover to catch hair and debris, and clean the trap regularly to prevent buildup. For more tips, check our article on shower drain tips.

Frequently Asked Questions
Why does my shower drain smell?
Shower drain smells can be caused by a buildup of bacteria, mold, or mildew in the drain. Regular cleaning can help eliminate these odors. Read more about this issue in our article on drain smell solutions.
Can I use vinegar and baking soda to clean my drain?
Yes, vinegar and baking soda are effective natural cleaning agents that can help break down debris and eliminate odors in your drain trap.
How often should I clean my shower drain trap?
Its recommended to clean your shower drain trap every few months to prevent clogs and maintain optimal drainage.
For more detailed information on preventing clogs, visit this external resource.
This article contains affiliate links. We may earn a commission at no extra cost to you.


