Pressure Relief Valves (PRVs) are vital components in various industrial systems. They ensure safety by preventing excessive pressure buildup. Testing PRVs with air is a common method to verify their functionality and ensure they operate correctly. Understanding the intricacies of this process is essential for any industrial engineer aiming to maintain system safety and efficiency.

What are Pressure Relief Valves (PRVs)?
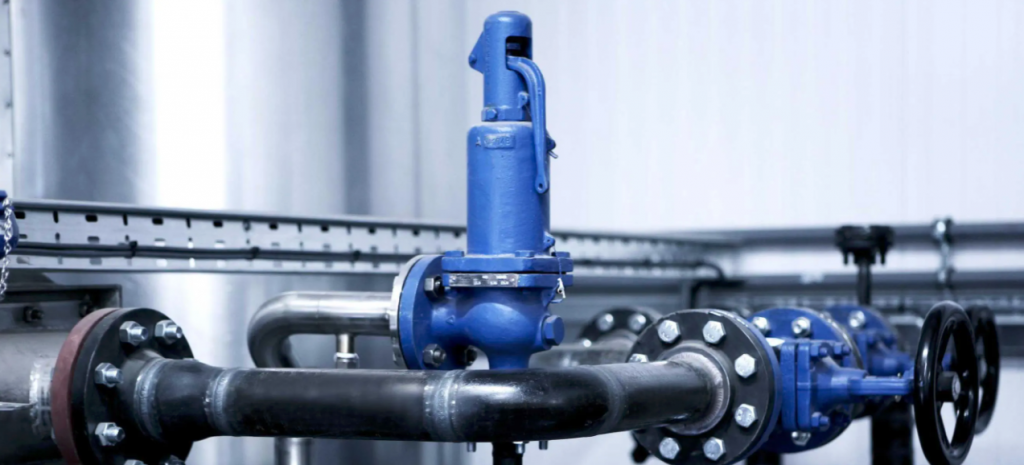
Pressure Relief Valves are safety devices designed to protect equipment and systems from overpressure situations. They automatically release pressure when it exceeds a predetermined limit, ensuring the system remains within safe operating conditions. PRVs are commonly used in industries such as oil and gas, chemical processing, and power generation.
Importance of Testing PRVs with Air
Testing PRVs with air is crucial for several reasons. First, it helps verify the valve’s set pressure and ensures it opens at the correct pressure level. Second, it checks for any leaks that could compromise the system’s integrity. Lastly, it confirms the overall functionality and responsiveness of the valve, providing peace of mind to engineers and operators.
Pre-Test Preparations
Understanding System Specifications
Before initiating the testing process, it’s essential to understand the system’s specifications. This includes the design pressure, operating conditions, and any specific requirements outlined by the manufacturer.
Gathering Necessary Equipment
Ensure you have all the necessary equipment for testing PRVs with air. This typically includes a calibrated pressure gauge, air supply system, and appropriate safety gear to protect against potential hazards.
Step-by-Step Guide to Testing PRVs with Air
Step 1: Isolation of the PRV
Begin by isolating the PRV from the system. This step is crucial to ensure that the testing process does not interfere with the system’s normal operations.
Step 2: Connection of Air Supply
Connect the air supply system to the PRV. Ensure that all connections are secure and leak-free to prevent any inaccuracies during the test.
Step 3: Gradual Pressure Increase
Slowly increase the air pressure while monitoring the pressure gauge. This gradual increase helps prevent any sudden pressure surges that could damage the valve or the testing equipment.
Step 4: Observing the PRV’s Response
As the pressure approaches the set point, observe the PRV’s response. It should open at the predetermined pressure level, releasing the air and preventing further pressure buildup. If the PRV fails to open or opens at an incorrect pressure, further investigation and potential adjustments are necessary.
Step 5: Leak Testing
After the PRV has opened and closed, perform a leak test to ensure no air is escaping through the valve. This step is crucial to confirm the integrity of the valve and its seals.
Post-Test Procedures
Documentation of Results
Document the test results, including the opening pressure, any discrepancies, and observations made during the test. This documentation is essential for future reference and compliance with industry standards.
Reinstallation and System Reconnection
Once the test is complete, carefully reinstall the PRV and reconnect it to the system. Ensure all connections are secure and leak-free before resuming normal operations.
Common Challenges in Testing PRVs with Air
Equipment Calibration
One of the common challenges is ensuring that all testing equipment is properly calibrated. Inaccurate readings can lead to incorrect conclusions about the PRV’s functionality.
Environmental Factors
Environmental conditions, such as temperature and humidity, can affect the test results. It’s important to conduct the test in a controlled environment or account for these factors when analyzing the results.

FAQs
Why is air used for testing PRVs?
Air is commonly used for testing PRVs because it is readily available, cost-effective, and non-hazardous. It allows for accurate testing without introducing additional risks to the system.
How often should PRVs be tested?
The frequency of testing depends on several factors, including the type of system, operating conditions, and industry regulations. Generally, PRVs should be tested at least once a year to ensure their functionality.
What should I do if a PRV fails the test?
If a PRV fails the test, it is important to investigate the cause of the failure. This may involve inspecting the valve for damage, recalibrating it, or replacing it if necessary.
For more detailed information on the impact of system backpressure on PRVs, visit this link. Additionally, you can learn about proper PRV orientation here. For a better understanding of the differences between pressure gauges and pressure relief valves, explore this guide. For more insights, visit Spirax Sarco.
This article contains affiliate links. We may earn a commission at no extra cost to you.


