As industrial engineers, understanding the intricacies of a relief valve installation guide is essential. Proper installation not only ensures safety but also optimizes performance, extending the lifespan of your equipment. In this guide, we will delve into the important aspects of installing a relief valve, exploring its components, and sharing best practices.

Understanding Relief Valves
A relief valve is a crucial component in many industrial systems. It serves to protect against overpressure, which can lead to equipment failure or even catastrophic events. By understanding its function and components, engineers can better appreciate the importance of proper installation.
Components of a Relief Valve
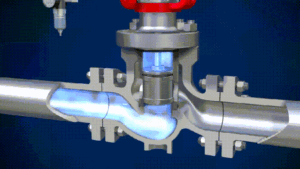
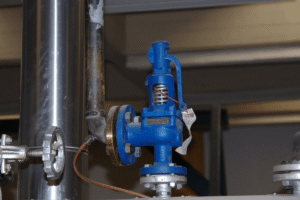
Relief valves typically consist of several key components: the valve body, seat, disc, spring, and bonnet. Each part plays a vital role in maintaining the valve’s functionality. The valve body contains the pressure, while the seat and disc work together to seal and release pressure as needed. The spring provides the necessary tension to keep the valve closed under normal conditions.
Preparation for Installation
Before beginning the installation of a relief valve, it is crucial to gather all necessary tools and materials. This preparation ensures that the process is smooth and efficient. Additionally, reviewing the manufacturer’s instructions and safety protocols is imperative.
Tools and Materials Required
The typical tools required for this installation include a wrench, pipe cutter, thread sealant, and pressure gauge. It’s also essential to have the correct size and type of relief valve for your system.
Safety Considerations
Safety should always be a top priority. Ensure that the system is depressurized and verify the absence of hazardous materials. Wearing personal protective equipment (PPE) such as gloves and goggles is highly recommended.
Step-by-Step Installation Process
Step 1: System Shutdown
Before installation, shut down the system and relieve any remaining pressure. This step is crucial to avoid accidents and ensure a safe working environment.
Step 2: Valve Placement
Determine the appropriate location for the relief valve. It should be easily accessible for maintenance and positioned where it can effectively relieve pressure. Typically, this is on top of a vessel or pipe.
Step 3: Preparing the Connection
Prepare the connection point by cleaning the threads and applying a suitable thread sealant. This prevents leaks and ensures a secure fit.
Step 4: Attaching the Relief Valve
Carefully attach the relief valve to the connection point using a wrench. Ensure that it is tightly secured, but be cautious not to over-tighten, which can damage the threads.
Step 5: Testing the Installation
After installation, perform a pressure test to ensure the valve functions correctly. Monitor for any leaks or unusual noises, and make adjustments as necessary.
Best Practices for Maintenance
Regular maintenance of your relief valve is crucial to ensure its longevity and reliability. Schedule routine inspections and tests to catch potential issues early.
Periodic Inspections
Conduct periodic inspections to check for corrosion, wear, or damage. Replace components as needed to maintain optimal performance.
Functional Testing
Perform functional tests to verify that the valve opens and closes at the set pressure. This testing helps ensure safety and compliance with industry standards.
Troubleshooting Common Issues
Even with proper installation and maintenance, issues may arise. Understanding common problems and their solutions can help minimize downtime and maintain safety.
Leakage
If leakage occurs, check the valve seat and disc for damage. Replacing these components can often resolve the issue.
Valve Sticking
A sticking valve may be due to corrosion or debris. Cleaning the valve and applying a suitable lubricant can often restore functionality.
Conclusion
Installing a relief valve is a critical task that requires attention to detail and adherence to safety protocols. By following this relief valve installation guide, industrial engineers can ensure a successful installation, optimizing system performance and safety.

FAQs
What is the primary function of a relief valve?
The primary function of a relief valve is to protect systems from overpressure by releasing excess pressure when necessary.
How often should relief valves be inspected?
Relief valves should be inspected periodically, typically every 6 to 12 months, to ensure they are functioning correctly.
Can I install a relief valve myself?
While it is possible to install a relief valve yourself, it is recommended to have a professional do the installation to ensure safety and compliance with industry standards.
For more information on safety valves vs. relief valves, you can visit AccuTest Systems.
For additional insights into valve-related topics, visit our related articles on bathroom leak vs humidity, bathroom sink overflow leak, and pressure relief valve for air compressors.
This article contains affiliate links. We may earn a commission at no extra cost to you.


